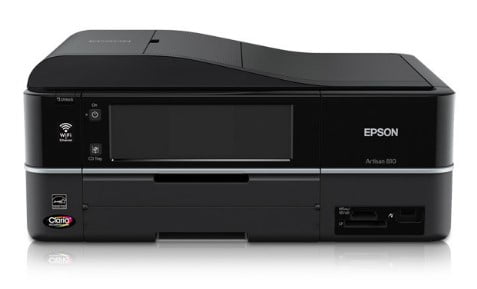
The Epson Artisan 810 Manual, Install paper handling wants to be versatile but sometimes annoying. Piggyback 30-sheet photo tray above 120-sheet, letter / legal main tray. 50 sheet output tray – a series of telescopic panels – pulling out of the photo tray area. Loading the main tray is the process involved: You must pull the awkward output extension, slide and lift the photo tray, provoke wide adjustments under the tray, and then restore everything as before. At least the ADF is a simple 30-sheet automatic document supplier.
The Epson Artisan 810 offers a large (7.8-inch) touch screen control panel, tilting, with a 3.5-inch color LCD. I found navigating the menu easy, but the many choices made me look forward to a thorough review (Epson didn’t provide it). Two media slots using CompactFlash, Memory Stick, SD Card, and XD-Picture Card; this unit has a PictBridge port too.
Operating System (OS)
Table of Contents
Windows 7 (x64), Windows 7 (x86), Windows 8 (x64), Windows 8 (x86), Windows 8.1 (x64), Windows 8.1 (x86), Windows XP (x64), Windows XP (x86), Windows 10 (x64), Windows 10 (x86)
Download Epson Artisan 810 Setup Links:
How to Install Driver Epson Artisan 810:
- Click to downloaded the file with Windows.
- Double-Click the Epson Artisan 810 Driver download
- Connect your Epson to the computer using USB and power on the printer
- Double-Click on the installation icon to start the installation.
- Then you follow the step by step instructions on your monitor screen.
- Finished, The Epson Artisan 810 Printer has been ready to use.
Read Also: Epson Artisan 635 Printer Driver Download for Windows 7, 8, 10
How to Install Epson Artisan 810 Using CD or DVD Driver:
Epson Artisan 810 users choose to install the driver using a CD or DVD driver because it is easy and fast to do.
- Insert the CD Epson Artisan 810 driver into your computer or PC.
- Let the CD run on your PC or Computer.
- Start to run the setup file, and you must follow the installation guide.
- Follow the actions(step) which appear on the screen to complete.
- You are asked to link(connect) a USB cable in between the Epson Artisan 810 and the computer system cable.
- It is important to note: do it after you read the instructions to do it. Don’t do it before you see the directions.
- Wait a while until the computer or PC identify(detect ) the Epson Artisan 810 printer and continues the process.
Don’t forget to include all the worths to the wizard up until you have finished the setup process. - The last thing to do is to try the printer. Try printing something to check whether the printer is working or not. If not, you can reinstall by following the steps above. Make sure you have done all the steps.
- The last thing to do is attempting the printer. Tray to print something to examine whether the printer is working or not. If it is not, you can re-install by following the steps above. Ensure that you have done all the actions.