The Epson WorkForce Pro WF-4820 All-in-One Inkjet Printer offers you the essential features of printing scanning, copying, and faxing. Utilizing PrecisionCore Heat-Free Technology, users will certainly delight in sharp prints with a 4800 x 2400 dpi resolution and superb rates of approximately 25 ppm in black and 12 ppm in shade. A selection of various document sizes is easily dealt with from small 3.5×5″ cards to big 8.5×47.2″ banners. The Epson WF-4820 printer is additionally with the ability of automatic duplex printing and features built-in Wi-Fi for cordless links to smartphones where customers can connect utilizing the Epson Smart Panel application, Apple AirPrint, Mopria, and more.
For dealing with media the WorkForce Pro WF-4820 provides a 250-sheet conventional input tray and a 35-sheet ADF, and the 8.5 x 11.7″ flatbed scan unit features an optical resolution of 1200 dpi, guaranteeing crisp photos and copies are generated. In addition, when using the ADF, the unit can scan and copy lawful size documents as much as 8.5 x 14″. A 4.3″ shade touchscreen is attended to fast navigation and control, and extensive security functions keep your records secure and risk-free.
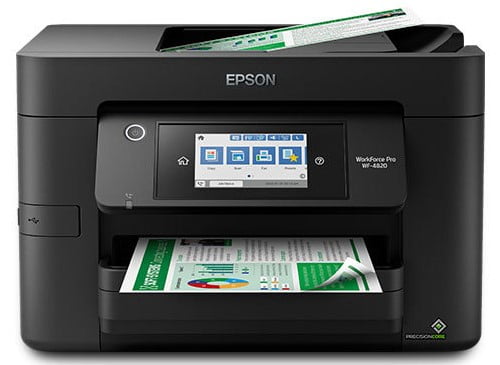
The Epson Workforce Pro WF-4820 accepts paper approximately 8 1/2 x 14-inch legal paper. This suggests it’s appropriate for practically any kind of task you might expect it to perform. On top of that, it automatically prints on both sides of the paper. You can turn paired printing on or off at will, indeed. Yet, by default, the Epson WF-4820 will begin conserving your cash from day one by printing on both sides. Regarding the rate, you’re considering an optimum of 25 web pages per min in black and white. This is a pretty vigorous pace, on the same level as all but the fastest office printers. If you need to escape a long document promptly, you’re well set up. Also completely shade, the WF-4820 will undoubtedly put out 12 web pages per min. If you’re printing brochures or various other vibrant documents, you will not have any problem.
Operating System (OS)
Table of Contents
Windows 7 (x64), Windows 7 (x86), Windows 8 (x64), Windows 8 (x86), Windows 8.1 (x64), Windows 8.1 (x86), Windows XP (x64), Windows XP (x86), Windows 10 (x64), Windows 10 (x86)
Epson WorkForce Pro WF-4820 Driver Links:
WorkForce Pro WF-4820 Scanner Driver Links:
Epson Pro WF-4820 Fax Utility Links:
How to Install Driver Epson WorkForce Pro WF-4820:
- Click to downloaded the file with Windows.
- Double-click the Epson WF-4820 Driver Download
- Connect your Epson to the computer using USB and power on the printer
- Double-click on the installation icon to start the installation.
- Then you follow the step-by-step instructions on your monitor screen.
- Finished, The Epson WorkForce Pro WF-4820 Printer has been ready to use.
Read Also: Epson WorkForce Pro WF-3823 Driver, and Software Download, Install
How to Install Epson WorkForce Pro WF-4820 Using CD or DVD Driver:
Epson WorkForce Pro WF-4820 users choose to install the driver using a CD or DVD driver because it is easy and fast to do.
- Insert the CD WorkForce Pro WF-4820 driver into your computer or PC.
- Let the CD run on your PC or Computer.
- Start to run the setup file, and you must follow the installation guide.
- Follow the actions(step) which appear on the screen to complete.
- You are asked to link(connect) a USB cable in between the WorkForce Pro WF-4820 and the computer system cable.
- It is important to note: do it after you read the instructions to do it. Don’t do it before you see the directions.
- Wait a while until the computer or PC identify(detect ) the Epson WF-4820 printer and continues the process.
Don’t forget to include all the worths to the wizard up until you have finished the setup process. - The last thing to do is to try the printer. Try printing something to check whether the printer is working or not. If not, you can reinstall by following the steps above. Make sure you have done all the steps.
- The last thing to do is attempting the printer. Tray to print something to examine whether the printer is working or not. If it is not, you can reinstall by following the steps above. Ensure that you have done all the actions.