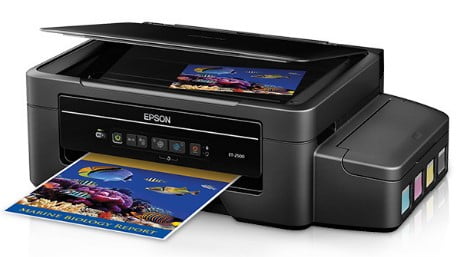
The Epson ET-2500 is a multifunction printer, copier, and scanner that can hold enough ink for the last two years without a single refill. The next refill bottle is also much cheaper than traditional cartridges, offering potential savings. The cost per page is very low, photo printing is very good, and scan quality, fast copying in black and white, is quick to get started The compartment containing the four ink tanks protrudes from the right side of the unit, giving ET-2500 a different look from the printer that uses the cartridge. Here, you lift the cover, and reveal four tanks, with a pop-off lid.
This Epson ET-2500 front control panel has a number of buttons and a small 1.4-inch screen, which makes stand-alone operations less than optimal, especially because it’s not a touch screen. When you use the control panel to start scanning, for example, the screen does not offer a settings menu to change the resolution. You need to make such adjustments on the PC.
Operating System (OS)
Table of Contents
Windows 7 (x64), Windows 7 (x86), Windows 8 (x64), Windows 8 (x86), Windows 8.1 (x64), Windows 8.1 (x86), Windows XP (x64), Windows XP (x86), Windows 10 (x64), Windows 10 (x86)
Epson ET-2500 Driver, Scanner, Download For Windows:
| File Name | Link Downloads |
| Epson ET-2500 Printer Driver v2.41 | Download |
| Epson ET-2500 Scanner Driver Utility v4.0.2.1 | Download |
| Epson ET-2500 Software Updater v4.6.1 | Download |
How to Install Epson ET-2500 Driver:
- Click to download the file with Windows.
- Double-click the ET-2500 Driver Download
- Connect your Epson to the computer using USB and power on the printer
- Double-click on the installation icon to start the installation.
- Then you follow the step-by-step instructions on your monitor screen.
- Finished, The Epson ET-2500 Printer has been ready to use.
Read Also: Epson ET-16500 Driver Download, Software, and Setup
How to Setup Epson ET-2500 Using CD or DVD Driver:
Epson ET-2500 users choose to install the driver using a CD or DVD driver because it is easy and fast to do.
- Insert the CD ET-2500 Driver into your computer or PC.
- Let the CD run on your PC or Computer.
- Start to run the setup file, and you must follow the installation guide.
- Follow the actions(step) which appear on the screen to complete.
- You are asked to link(connect) a USB cable in between the Epson ET-2500 and the computer system cable.
- It is important to note: do it after you read the instructions to do it. Don’t do it before you see the directions.
- Wait a while until the computer or PC identifies (detects) the Epson ET-2500 printer and continues the process.
Don’t forget to include all the worths in the wizard up until you have finished the setup process. - The last thing to do is to try the printer. Try printing something to check whether the printer is working or not. If not, you can reinstall it by following the steps above. Make sure you have done all the steps.
- The last thing to do is attempt the printer. Tray to print something to examine whether the printer is working or not. If it is not, you can reinstall it by following the steps above. Ensure that you have done all the actions.